The harmonica is a small instrument with a wide frequency range, which means it can sound rich and expressive—or thin, harsh, and piercing—depending on how it’s recorded and EQ’d. Proper EQ helps you remove unwanted noise, control harsh frequencies, and bring out clarity without losing the character of the instrument. Below is a practical, real-world approach to EQ’ing a harmonica for a clean, balanced recording.
Start With a Clean Recording
Before touching EQ, make sure the source is solid. Record at a healthy level without clipping, and avoid excessive room reflections if possible. A poorly recorded harmonica cannot be “fixed” with EQ—EQ should enhance, not repair. Once the recording is clean, EQ becomes simple and effective.
High-Pass Filter: Remove Unwanted Low End
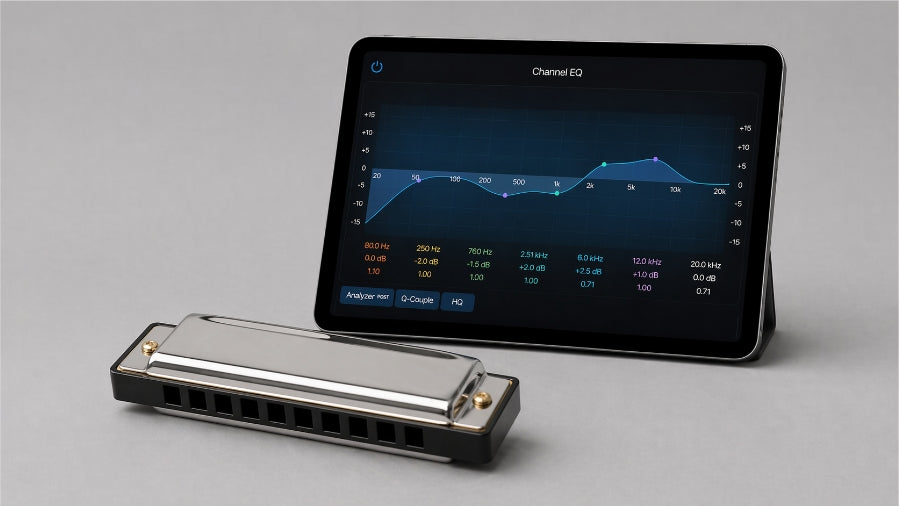
Apply a high-pass filter to remove unwanted low end, as most harmonicas produce little useful sound below the bass range. Setting the filter around 80–120 Hz clears low-frequency rumble, breath noise, and handling vibrations without affecting tone; for solo harmonica you can go slightly higher, while blues or amplified styles benefit from staying lower to preserve warmth. The goal is a clean low end without thinning the sound.
Low Mids (200–500 Hz): Control Muddiness
The low-mid range (200–500 Hz) is where harmonicas often sound boxy or muddy, especially when recorded close to the microphone. If the tone feels congested, apply a gentle cut of 2–4 dB around 250–400 Hz, being careful not to remove this range entirely, as it provides body and fullness. The aim is to reduce muddiness while preserving warmth and presence.
Mids (800 Hz – 2 kHz): Shape Presence
The mid range (800 Hz–2 kHz) controls how forward the harmonica sits in a mix. Too much can sound honky or nasal, while too little causes it to disappear, so apply a small cut around 1–1.5 kHz if it feels aggressive, or a subtle boost in the same area if it lacks presence. The goal is to balance clarity with smoothness.
High Mids (2–5 kHz): Tame Harshness
The high-mid range (2–5 kHz) is where harshness and ear-fatiguing tones often appear, especially with aggressive playing, bright microphones, or amplified harmonicas. If notes sound piercing, apply a narrow cut around 3–4 kHz, sweeping slowly and reducing only what’s necessary, as over-cutting will dull the sound. The goal is to remove bite without losing anything.
High Frequencies (6–10 kHz): Add Air (If Needed)
The high-frequency range (6–10 kHz) adds brightness and air to a harmonica, so if the recording sounds dull or closed-in, a very gentle boost of 1–2 dB around 7–9 kHz can help open it up. If the track already sounds bright or noisy, skip this step, as breath noise and hiss often live here. The goal is to add openness only when the recording truly needs it.
Learn to Record and Shape Harmonica Tone Properly

When shaping harmonica tone, always EQ in context with backing tracks or other instruments, as a sound that works solo may be too bright or too soft in a mix—make small adjustments and trust your ears, aiming for EQ that feels almost invisible. For a complete, structured approach, The Complete Harmonica Player teaches tone control, breath technique, recording and sound-shaping alongside core playing skills, guiding beginners through correct holding, breathing, notes, chords, rhythm, tablature, practice routines, and beginner-friendly songs, with clear diagrams and practical guidance in a downloadable PDF designed to build real technique, musical understanding, and confidence from the ground up.